10Dec/09

Engraved damasteel knife

This knife has been in the making for quite some time now. Actually, it’s been waiting queue for engraving most of that time. The knife itself was finished about a month ago, but different and more urgent projects had to be completed before I could engrave it.

The blade is made of damasteel, which is kind of stainless damascus made in Sweden. This knife was the first one where I’ve used that steel and I really-really like how it came out. The pattern on the steel is very fine and extremely beautiful. Now I want to make all knives from that steel, just need to find customers who can afford it :). Any takers?

Engraving itself took 10 hours, design was about 3-4h.

Engraved damasteel knife

Engraved damasteel knife

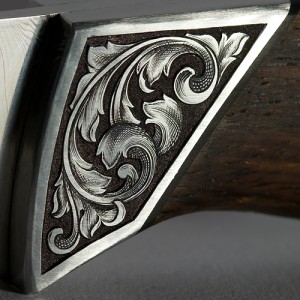
Engraving close-up

Engraving close-up

02Dec/09

Silver Zippo engraving

What are the best days for engraver? When a customer comes in and says “Do me something nice on that silver Zippo. I like your scrollwork and just do your thing. I’m sure it’ll be good looking lighter”.

So I get to drawing board, I can try out some new styles, play with ideas for a while and then “do my thing” on a lighter. Sure it can take way more time than allowed by the budget, but it’s fun and I’m always learning new things for the future.

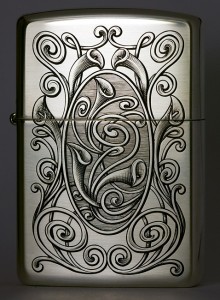
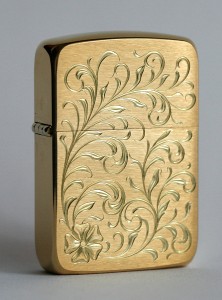
One engraving style that has fascinated me since I first saw it, is called “Liberty”. It has quite unique look to it and can be concluded with one work – spaghetti’s. But very beautiful and graceful ones.

Without further ado, here my next Zippo project on a silver body.

Hand engraved Zippo

Hand engraved Zippo

06Nov/09

More of that Zippo engraving jazz

My bulino practice plate has had some progress, so now it is about 50% completed. Unfortunately at this time I don’t have time to work on it for quite some time. Few engraving, knife and sword projects need my attention. But, here’s what I have up to now.
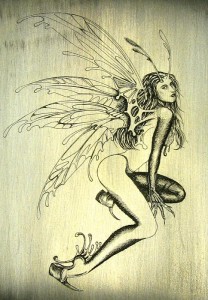
Bulino Angel

Bulino Angel

I definitely learned a lot from this practice and next one will be hopefully better. It is was quite a surprise for me how small the dots have to be to create nice smooth effect. Basically just mere teeny-tiny scratches on the surface and even then it’s rather easy to overdo it. That engraving is 5cm high, nose is 1mm high and 0.5mm wide. Just to give you a sense of scale…

In the mean time I engraved one more Zippo for a customer. Design was given to me, so my job was just to engrave it.
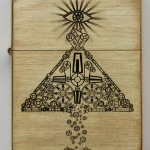
Engraved Zippo

Engraved Zippo

Quite nice design, isn’t it?

Design for ZippoI’m also preparing for next Zippo engraving project. Design for that engraving is about 90% completed, just need to touch it up a little and it’s ready to do. As you can see I’m trying out yet another style. It’s called Liberty (some engravers call it spaghetti scroll, because of all those long, skinny and intervening… spaghettis). So, if you’re interested in getting a Zippo with that kind of engraving, now is the time to let me know.
28Sep/09

More bulino practice

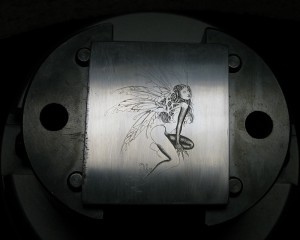
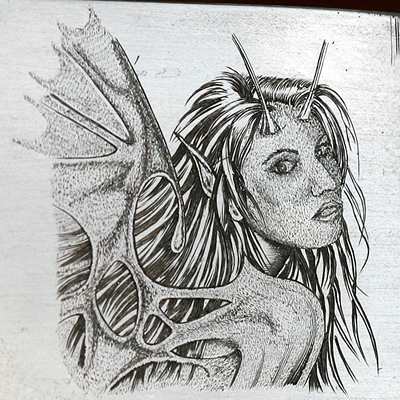
Little while ago I did one small portrait for practice, now I’m halfway through with the whole image. The progress is quite slow on this, because I’m still learning the technique. So far it looks quite alright, but the hardest parts are not yet done – face and bulk of the body. Wings will not be too difficult, because nobody really knows how they should look like, it’s all fantasy there ;). Face is different story, even if you don’t know anything about art or composition, you can spot immediately when face doesn’t look right. Currently only the main outlines of face are done, eyes and nose are in right places, but mouth is little bit off. Need to fix that.

Bulino engraved angel

Bulino Angel (Artwork by Armando Huerta)

When this practice works out, then I will engrave that same image on silver Zippo and can send it out to a customer.

I’m really happy about customers who push me beyond my comfort zone, and are willing pay for these experiments. This is that kind of project – I’ve never done any bulino work before and starting with a human is quite a challenge.

02Sep/09

New records

When I started engraving I made one ‘record’ – engraving 10 lines in one mm. I was quite happy about it. But now time has moved on and I thought I need to push this a little.

The results are:

  • 29 lines per mm
  • ~200 dots per square mm (with little spare room)
How small can you engrave?

How small can you engrave?

As you can see, normal shading lines look darn huge here, actually to naked eye they create a nice smooth white-grey-black effect. Looks like normal shading for me is about 5-8 lines per mm. These dotted squares are with 1mm sides and the whole ‘channel’ is also 1mm wide.  Very light grey dotted area has maybe 70-80 dots, so there’s enough room to create nice in-between tones. Just need to find the right balance.

This is extreme close up and you are actually never supposed to see any engravings magnified that much.

30Aug/09

First try in Bulino

Bulino means in Italian burin, or graver. When engravers talk about bulino technique, it usually means engraving pretty (small scale) pictures. This technique came from Italian engravers and they create truly amazing works of art with this, and they don’t use any power tools, just one graver and small 10x loupe. Works from masters like G. Pedersoli or Firmo Fracassi are so well made, that you’d think it is photo.

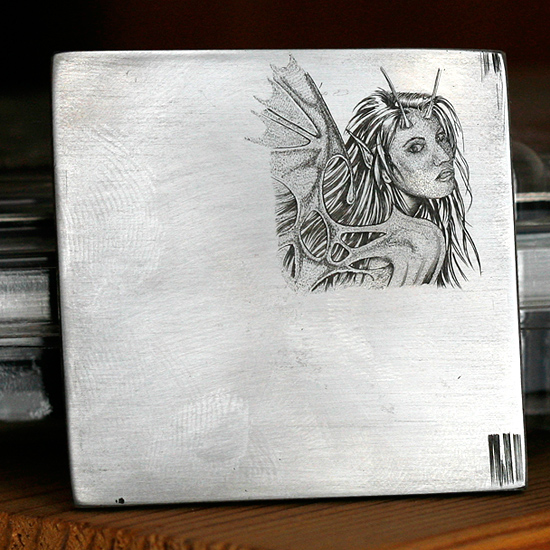
One customer ordered a Zippo with engraved picture on it. As I have never done any bulino work before, I took the hardest part from that picture, a facial part of that woman, and engraved it about 3x bigger than it will be on Zippo. Here is my first finished practice plate with bulino engraving.

In real life size it is about this big:

Real size

Real size

Bulino engraving

Practice plate with enrgaving

Engraved woman

Engraved woman

As you can see, more practice is needed.

11Jul/09

In process die engraving

After listening 2 workshops in Engrave-In 2009 about die making, I just had to try it out myself. Dies are used in making certain items in large quantities. Coins, pins and all that kind of things are struck with dies. In current digital age most of the dies are made with CNC machines, but I like handmade things. So I’m making one by hand.

The steel I use is Uddeholm K600, which is special die steel that is tough and is designed especially to handle striking.

The overall process is something like this:

  1. Create master die (that’s the one I make now) – positive
  2. Heat treat master die
  3. Create the hub (negative, or working die) by hubbing – press the positive heat treated die into another soft steel piece
  4. Heat treat the hub
  5. Start striking

So far I can do steps 1 and 2, but the rest is currently unknown. I have to find some kind of relatively strong press for hubbing. Some say it should be at least in the range of 200-250 tons.

Even if I don’t find a press and can’t use this die for making any ‘coins’, it is still useful practice for sculpting. So I don’t worry about it too much right now.

Here it is.

In process die engraving

As you can see it is very simple design and that’s in purpose. I want to complete it and get at least somewhat decent result.

Close-up of hand engraved die.

14Jun/09

Some new engraved stuff

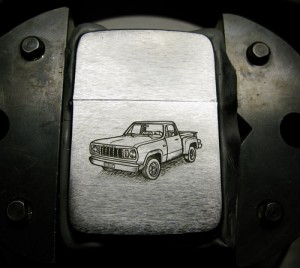
Here are some things I’ve completed recently. Double bevel cut Zippo, vintage 1941B model:

Engraved Zippo lighter

While browsing around in some shop I found an interesting thing – stainless tablecloth hanger. To tell the truth, before I didn’t even know such things existed. But they could prove useful, you hang two or more of these on different corners of your tablecloth and they keep it straight and in place.

As with all plain metal things, I just had to try to engraving it:

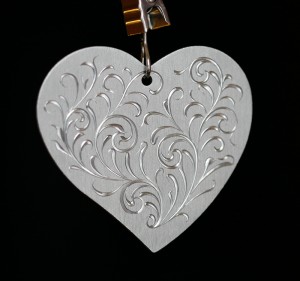
Engraved tablecloth hanger

Again, on sale: Engraved tablecloth hanger.

From same shop I bought wine opener, it is waiting to be engraved. Hopefully in next few days.

In the future I hope to add new engraved items and also knives to the shop as often as I can, so you might want to check it from time to time, or subscribe to Shop Feed.